Archive for October, 2011

October 31, 2011

Make it Monday: Skull Glass Block

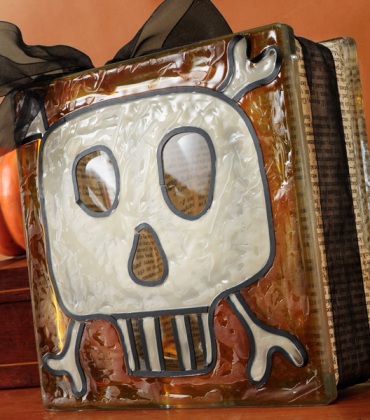
It’s finally here! Happy Halloween. Looking for one more last minute Halloween project to make? Try to re-create this Skull Glass Block. Glass blocks are such a versatile surface to craft with. The possibilities are endless, and here is something you can do with them for Halloween. This skull glass block makes for a wonderful decoration to place in your home, or on your front porch. This project was created by Cathie Filian and Steve Piacenza. Click here to learn how to make this project, and click here to see more Halloween projects from Cathie & Steve.

October 29, 2011

Watch Our Newest Video from Plaid Craft TV: How To Make A Paper Quilt

This week on Plaid TV we have another how to craft video hosted by Cathie Filian and Steve Piacenza. In this video let Cathie and Steve teach you how to make a paper quilt with scrapbook paper. This video is fun to watch and very easy to follow along. We have several other craft how to videos on Plaid Craft TV. Click here to see more. Also please let us know what other craft channels you like to watch on YouTube?

October 28, 2011

The Winner of our FolkArt Giveaway Is…

Lindy from Veni Vidi Scrappy

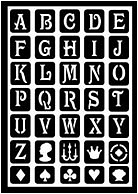
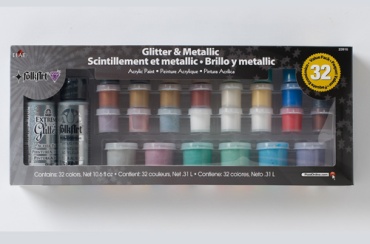
She is the winner of our FolkArt Giveaway. The prize pack includes, 1 Large Fleur Motif FolkArt Stencil, 1 Alphabet Peel and Stick Stencil Sheet, and a 32 color FolkArt value pack paint set. This paint set includes metallic and glitter FolkArt colors.

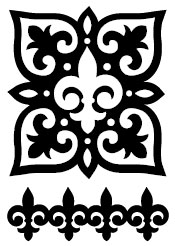
Felur Motif Stencil

Alphabet Peel and Stick Stencil Sheet

FolkArt 32 paint color value pack

Thanks to everyone that participated and entered this giveaway. If you were not the winner this time, don’t worry we have another great giveaway coming up very soon. Be sure to check back daily on Paint Me Plaid, so you don’t miss your chance to enter.

October 28, 2011

Paint Me Plaid: Guest Blogger (My Girlish Whims)

Happy Friday everyone! We here at Paint Me Plaid love to showcase the amazing crafts that other craft bloggers create, but in addition to showing off their crafts we want to spotlight the crafter as well. Today we have a guest blogger, Rebecca. Enjoy!

Hello there! My name is Rebecca and I blog over at My Girlish Whims. My blog is all about beading, crafting, and general life as a girl!

I’m a 21 year old girly girl from the Philly suburbs area. I’m currently finishing up my last semester of college and craft basically whenever I’m not in class or doing homework! I’m a major beadaholic, and have been making jewelry since I was a kid. I also love doing DIY crafts of all kinds, and love having a blog to show my creations off to someone else besides my roommates! I’m also getting married in February so have been having fun making wedding plans and doing as many DIY projects for it as I can.

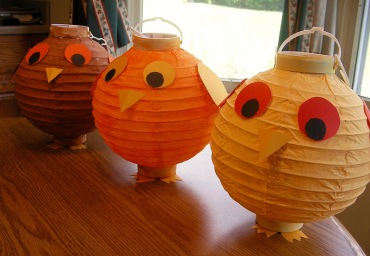
Today I’m going to show you how to make these owl paper lanterns!

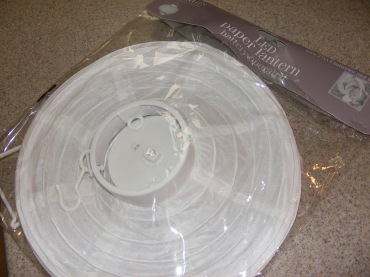
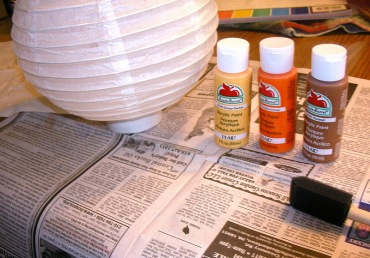
I found these paper lanterns for $1 at the dollar store while in search for decorations for my sister’s owl themed baby shower. They are pretty ugly as is, but I got an idea to spruce them up a bit using some Apple Barrel paint!

I picked three different paint colors that coordinated well with the owl/woodland/orange theme of the shower.

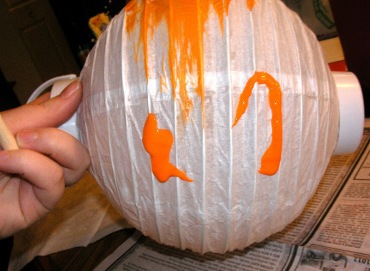
And squeezed the paint directly onto the lantern…

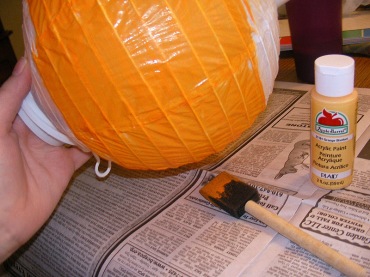
and then gently bushed it out all over the lantern.
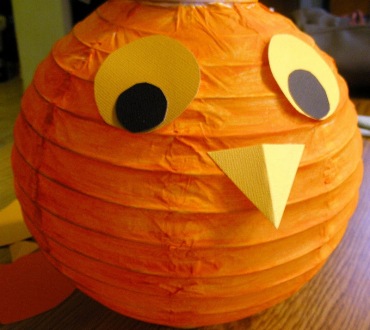
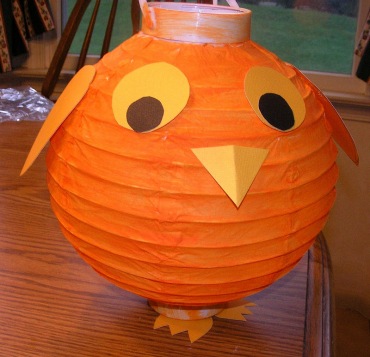
I cut out pieces of card stock for the eyes and nose and hot glued them on.
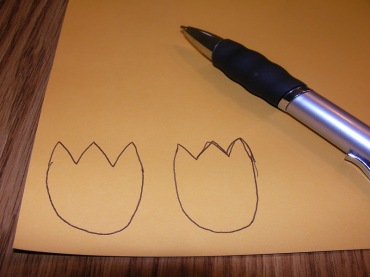
I also traced out little feet with card stock.

And then cut them out and hot glued them onto the bottom of the lantern.

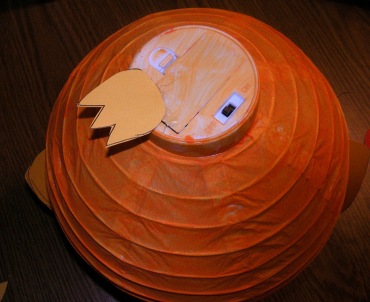
Lastly, I cut out wings and hot glued them to the side of the lantern.

Then ta-da! I cute little owl lantern!

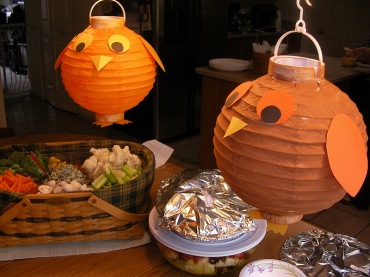
I hung them off a light above the kitchen table where the food was for the shower. The owls were the perfect touch for the shower!

To see some of the other projects I have done, come visit my tutorials section! I’d also love for you to link up to my weekly link party, Your Whims Wednesday, and show off some of your own girlish whims!

Thanks so much for having me here Plaid!

October 27, 2011

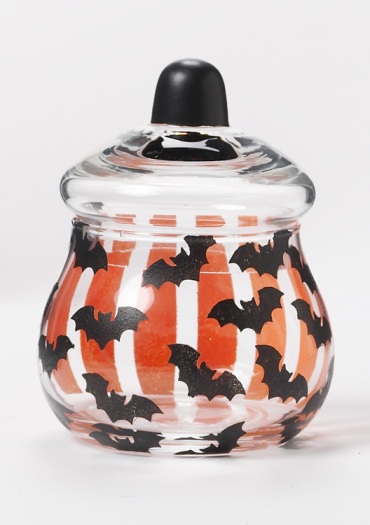
Teaching Thursdays: Martha Stewart Spooky Bats Apothecary Candy Dish

Looking for a place to store some of your Halloween candies? Well your in luck, why not create this Martha Stewart spooky bats apothecary dish? Perfect for a side table, this candy dish is a simple and fun container for Halloween treats!

Plaid Supplies

  • Martha Stewart Crafts™ 2oz Multi-Surface Satin Acrylic Craft Paint – Carrot
  • Martha Stewart Crafts™ 2oz Multi-Surface Satin Acrylic Craft Paint – Beetle Black
  • Martha Stewart Crafts™ Patterning Tape
  • Martha Stewart Crafts™ Foam Pouncers Set – 6pc
  • Martha Stewart Crafts™ Holiday Icons II Adhesive Stencils

Other Supplies

Apothecary candy jar, Water container, Rubbing alcohol, Paint palette, & Paper towels

Instructions

  1. Clean glass candy dish with warm soapy water, rinse in clean water, and dry thoroughly.
  2. Moisten paper towel with rubbing alcohol and wipe over entire glass surface; allow to dry.
  3. Measure and mask desired widths using patterning tape, leaving front of candy jar free of stripes.
  4. Mask off above and below vertical strips for desired height.
  5. Load pouncer with Carrot and paint vertical bands representing pumpkin sections.  Allow to dry and reapply if necessary.  Allow to dry.
  6. Position bat adhesive stencil in center of jar and stencil with Beetle Black using pouncer.  Reposition stencil and paint a second bat.  Continue until desired number of bats in flight is completed. Allow to dry.
  7. Paint glass ball handle on lid with Beetle Black.  Allow to dry.
  8. Curing Instructions: When dry, bake to cure.  Place glass in cool oven; set oven to 350°F and bake for 30 minutes.  Turn oven off and allow to cool in oven.  Remove when completely cool.
October 26, 2011

Web Wednesday: Dollar Store Angry Bird Pumpkins

This is too cute! Our friends over at Nothing But Country created these Angry Bird pumpkins. This is a great project to re-create, that cost practically nothing. The pumpkins came from the dollar store, and they used various FolkArt paint colors. A great project to get your kids involved with. Angry Birds are such a hot trend this Halloween. We have spotted several creative craft projects, and even Halloween costumes. To see how these adorable dollar store Angry Bird pumpkins were created click, here.


October 25, 2011

Enter Our Great FolkArt Giveaway… Don’t Miss Out!

It’s giveaway time here again on Paint Me Plaid. This week we are giving away a great prize pack filled with some new FolkArt products. Have you heard about our new Easy to Paint line? Well in this line (available at Michaels), we have created stencils, rub on patterns, and peel and stick stencils that are perfect for anyone looking to learn how to craft. Anyone can paint with Plaid’s new collection of FolkArt® painting design tools. Each provides simple techniques for creative, satisfying results, and they work interactively to expand painting and design options. Detailed how-to instructions build skills and fresh project ideas provide inspiration. The prize pack includes, 1 Large Fleur Motif FolkArt Stencil, 1 Alphabet Peel and Stick Stencil Sheet, and a 32 color FolkArt value pack paint set. This paint set includes metallic and glitter FolkArt colors.

Felur Motif Stencil

Alphabet Peel and Stick Stencil Sheet

FolkArt 32 paint color value pack

All you have to do to enter is leave a comment below, telling us what craft you would create using any of these items.

For extra entries (leave a separate comment for each):

Check out our sister blog, Plaid Kid’s Crafts, and let us know a project you find there that you think is cool

Like Plaid on Facebook and let us know you entered the giveaway

Follow @PlaidCrafts on Twitter

Entries will be accepted beginning today, and end on Friday October 28th at 12pm EST. We will announce the winner on Friday afternoon October 28th.

October 25, 2011

Tuesday Huesday: A Cozy Halloween Room

Decorating for Halloween can come in many forms. You can decorate your porch outside, dress up yourself, or spruce up a room in your home. Well have you ever thought about decorating for Halloween, minus the scary decor? Instead of using ghosts and spider webs, try using a nice Halloween color palette. Incorporate some stencils to add a little touch of creativity to the room. Here is an example pictured above. This room used Halloween colors well, and this palette is very warm and inviting. Try replicating this rooms decor, by using one of our stencils.

This palette was created using FolkArt acrylic paint colors:#450 Parchment, #925 Wrought Iron, #628 Pure Orange, and #433 Terra Cotta


October 24, 2011

Make it Monday: Halloween Batty Pot

By: Sherrie Ragsdale


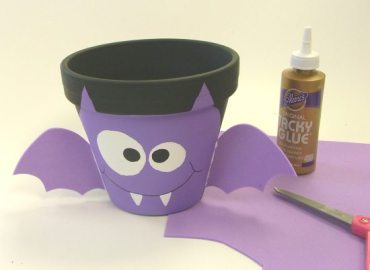
Let the countdown begin to Halloween. With only a few days left, here is a cute, and creative Halloween craft to make. It’s perfect for kids to make also. Use this batty pot, to hold all your Halloween goodies.

To make this adorable bat pot you will need the following supplies,

Apple Barrel Paints:

20226 Petunia Purple

20504 Black

20503 White
6” Clay Pot
Black Permanent Marker
1 ¾” Spouncer
1 ¼” Spouncer
Purple Foam Sheet
Craft Glue
Paint Brushes
Scissors
Pencil
Base coat the pot with petunia purple and allow to dry.
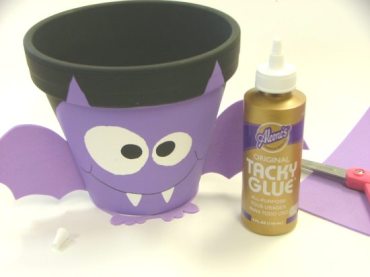
Add the eyes of the bat by dipping the spouncers in to the white paint

Add the centers of the eyes by dipping the other end of the spouncer in black and adding black dots to the white circles.

Add the mouth by using the black marker.  Paint the triangles for the teeth with white.  Allow to dry.

Mark off a circle for the face and two triangles for the ears.  Paint around the face with black.  Allow to dry.

Using the pattern provided, cut out two wings from the purple foam.

Glue the wings to the side of the pot.

This is with both wings glued into place.

Using the purple foam, cut out the feet from the purple foam.

Glue feet to the bottom of the clay pot.

October 22, 2011

Watch These New Videos feat. Plaid Crafts

Do you watch craft videos? Well if you don’t, you are missing out. Craft videos are a great educational resource, and a great way to get new inspiration for your next project. We wanted to share with you two new videos that feature craft products from Plaid.


Want to learn how to make a masquerade mask? Then check out this video from Cathie and Steve, featuring Mark Montano. This video is just in time for the Halloween season, or anytime of year.

Our friends over at When Creativity Knocks, recently created this great video tutorial on how to make a Halloween Tote. This tutorial is simple and fun to make. It features fabric Mod Podge. Click here to watch and learn.