Posts tagged ‘Painting’

February 2, 2012

Teaching Thursdays: Painted Plates

By Candie Cooper – To see more crafts created by Candie visit her blog, Candie Copper’s Journal.

We all love those paint your own pottery shops, don’t we?  I think one reason is because we can use what we create. This project is inspired by that very idea–painted plates to eat from! In one of my craft classes we were painting glass plates. A woman brought her five year old along and I only wish I had a picture of the plate the little girl had painted. It was so playful and fun!

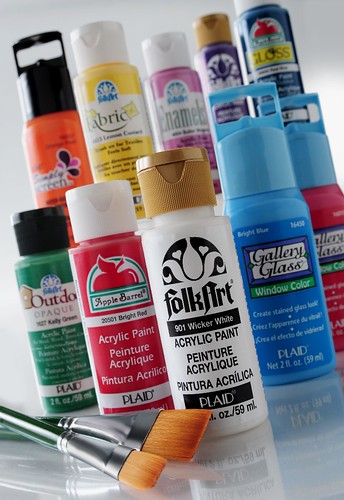
You will need a glass plate, bowl or other item, soft bristle brushes, and Folk Art Enamels. The thrift shop is a great place to find nifty glass surfaces to paint on. When choosing paint colors, a fool proof pallet for small children is to use all cool colors or all warm colors, so if things get smeared–it’s ok!

This was my first time trying out the new Folk Art Enamel Glitters. I’m hooked! If you like Extreme Glitter, then you will be too.

For all over sparkle, paint a coat of gold or silver (or both) onto the BACKSIDE of your blank plate and leave to dry. When painting on glass, only paint where food will not touch. Don’t worry, these paints are non-toxic, but it’s best to paint on food-free areas. Plus it looks really good through the glass. Once you have a glitter coat down, start in with the design. For a rainbow design like this, use a hair dryer to dry the coats of paint in between to prevent colors mixing (aka mud).

For this plate, paint the heart first (two coats for complete coverage) and then add silver polka dots with aqua rings.

Use skinny and wide brushes to paint the rings. Don’t worry if they are brushy or over lap–it all works out in the end. You can always add a second coat of color after the first dries.
 

Use a soft bristle brush to apply a coat of Folk Art Enamels Glitter over the dried paint design on the back side of the plate. Wait for this coat to dry and then apply a second coat for a super sparkly effect.
 

Check out that gold sparkle?! I love it so much and it looks even more spectacular in person.

This is two coats of silver Enamel Glitter paint behind the heart and polka dots.

Pop!  Zing!  Yummmmmm, right?!?
If you are curious about Folk Art Enamels, take a peek at the FAQs page here.
 

August 18, 2011

Teaching Thursdays: Craft Dorm Decor

By: Candie Cooper – See more of Candie’s crafts at Candie Cooper’s Journal)

This morning I was listening to a story about the movie, “American Grafitti” on NPR.  American Graffiti is about kids living in a small town one more summer before shipping out to college.  My story is pretty much the same, except I didn’t race cars at the end.  It seemed like it took forever for orientation day to come.  I also remember picking out things like a twin size comforter, crates, a futon and shower caddy for my dorm at Purdue.  If you have someone heading to college this year, this is a great send-off gifty for the recent grad.  They are stackable nesting boxes that can be tucked anywhere and hold everything from chewing gum and shots of espresso to flashcards (at least that’s what mine would’ve held).

These are the boxes—see how they fit together so cute?

Pick out the die cuts and lay them out in the boxes.  It helps to take a picture before painting so you can see how you arranged them when it comes time to Mod Podge.

Base coat the boxes in whatever colors you like—school colors would be fun too!  If you look at the brushes above, you’ll see a flat, angled and then another flat paint brush.  The angled brush is key for getting into corners.  I used Apple Barrel paints for this project because they are a little thinner than Folk Art.  The boxes soaked up the paints and dried really fast.

Dry brushing is my favorite surface painting technique.  It’s easy and looks cool when done.  Try some Silver Anniversary Folk Art paint for this step.  My mom actually painted while I took pictures. Insert me saying, “now, hold still”…..”ok, hold still”….” I REALLY need you to hold still.”  We have fun.  She’s the queen painter in the family.

The key to dry brushing is using a really coarse haired brush, dipping it in paint and removing most of the paint off to the side.  Soft bristle brushes don’t work.  Run the brush along your wood surface in whichever direction you like.  You can always practice on a scrap surface first.

Use Mod Podge gloss to adhere all the die cuts—this is where the photo that you took earlier comes in handy to figure out placement.  Photos or school mascot bumper stickers would also be great embellishments.

Now you’ll need the small and large flat brushes (see photo above) to make some stripes around the top of the boxes.  The inner and very outer boxes get tiny stripes and the middle large stripes.  This looks really cool when they’re all together.

A tip for making stripes is to have your brush fully loaded with paint to create really solid stripes.  Less paint makes for brushier stripes.


Seal all of the boxes with Folk Art Gloss acrylic varnish.  This makes everything look nice and finished.  Let’s take a look at all the boxes….


As usual, I want a set of these for holding instant coffee and teas, tubes of seed beads and lip gloss.  Looking at that list, I still feel a bit young at heart.

Wishing you a great back to school season, I am…Candie

August 16, 2011

Tuesday Huesday: Turquoise and Orange Living Room

During the summer, I become easily inspired to mix and match colors together, that at first glance may not have been thought as a good fit. Turquoise and orange is certainly not a go to pairing, but looking at these colors together definitely put a smile on my face. These colors together can lift the energy in any room. It can be used in so many different design styles, as you can see from the living room above. Adding a pop of color to any living room can instantly alter the vibe. The palette below has such a summertime vibe. It is energetic yet soothing at the same time. What do you think of the turquoise and orange color pairing?

We created this color palette using FolkArt Acrylic colors, Tangerine # 627, Calypso #542, Wicker White #901, and Sunny Yellow #509.

August 12, 2011

Ask Plaidie Laddie: Can I Mix Stain Colors?

Plaidie Laddie is back today, and ready to help tackle any urgent painting questions. Don’t be alarmed by his fur and paws,  he is a very skilled and knowledgeable crafter. Looks can be deceiving 🙂  For those of you who may be new to our blog, Plaidie Laddie is our loyal Plaid pooch, and one of our blog contributors. Throughout the month he helps answer your most burning painting questions.  This week’s question is in response to the Just Another Day In Paradise Plaque project we posted yesterday:

“Dear Plaidie Laddie, I was very inspired by the Just Another Day In Paradise Plaque, I saw posted on Paint Me Plaid. In the project a FolkArt stain was used. I have used paint stains before in other crafts, but I wanted to know if I can mix stain colors? Any advice you can offer would be greatly appreciated.” – Nicole from D.C.

Hi Nicole. Thank you so much for following our blog, and asking your question. All colors within the FolkArt® Stain line can be poured together to create a new color. They can also be mixed wet on wet to achieve different colors. Wet on wet simply means, that you brush the first stain color, then immediately brush the second color on. finally, wipe off both with a clean soft cloth.

August 12, 2011

2nd Annual Trick Your Pumpkin Contest

Plaid is having a contest celebrating Halloween! This year, we are celebrating the many faces of Halloween! Here’s your chance to show us your favorite pumpkin face and win great prizes.

We want YOU to create a three-dimensional pumpkin using your favorite Plaid products – and there are no limits to what you can create!  All we ask is that the pumpkin be three-dimensional – this means that no flat pumpkins are allowed – the actual pumpkin body itself must be at least 1/8” thick. Possibilities include real pumpkins, craft pumpkins, paper mache, clay pots, wood, fabric and more. Use your imagination and Trick Your Pumpkin!

I’m sure you are wondering what are the prizes for this contest?

Prizes include: Grand Prize: $100 cash and a Plaid gift basket of merchandise worth $50 retail value. Runners-Up: 5 recipients will receive a Plaid gift basket of merchandise worth $50 retail value.

To find out the rules of this contest, and how to enter click here.

August 9, 2011

Tuesday Huesday: Summer Brunch

One of my favorite summer activities to do is, have brunch. Since I am here in Atlanta, brunch is always a very popular activity, especially in summer. People in Atlanta love to eat outside, and sip mimosas. I usually have brunch at least twice a month with my girlfriends. That is why this image from Traditional Home caught my attention. Now the brunches I attend have never had tables decorated as beautifully as this one, but a girl can dream right? I fell in love with the colors used to decorate this table. Set in a garden, this would be a wonderful place to have a summertime brunch. Now some could argue that the colors used here, are more spring than summer, but I will disagree because this palette is interchangeable within those seasons. These colors are calming, and make for a great backdrop to any space. I hope you are inspired by this table setting, to use this palette to bring a mixture of spring and summer into your home. Have you had brunch somewhere fabulous lately?

We created this color palette using FolkArt Acrylic colors, Tickled Pink #319, Seashell Pink #2485, Apple Orchard #2241, & Turners Yellow #679.

August 5, 2011

Freelance Friday: Multiple Projects Using FolkArt Enamel Paint

I have noticed several comments from some people new to crafting, inquiring about which surface should they use FolkArt Enamel paint on? This is a great question, and the answer is that FolkArt Enamel paint can be used on several different surfaces. But are created specifically for painting non-porous surfaces (any glass, metal, ceramic). I recently came across these great craft projects I found on Keep Calm and Craft, that shows several surfaces and projects created using FolkArt Enamel paint. Check out their blog to learn how to make these projects and more. To view all the colors FolkArt paint comes in click here.


August 2, 2011

Tuesday Huesday: A Rich & Vibrant Table Setting

Have you been to an outdoor summer dinner party lately? Well, I have recently and had a ball. When I saw this amazing table setting, it reminded me of the dinner party I attended. I really should’ve taken a picture of the table setting, but hindsight is 20/20, LOL. Anyways, I digress, I saw this rich and vibrant table setting on a site called, Hostess with the Mostess.  The colors used within the table are so gorgeous, that you almost want to eat them! The richness of the reds, purples, and yellows, are mind blowing. I think often times we can take for granted how special it can be to eat and fellowship with friends and family. Although we may not have the time everyday to decorate our tables, definitely take a cue from this fabulous setting and try to jazz up your dinner table once in awhile to make your meal a little be more special. Also use this color palette as inspiration to add some rich and vibrant colors to your own home. Have you been to an outdoor dinner party recently, or decorated your own table in a unique way? Please let us know.

We created this color palette using FolkArt Acrylic Colors, Ocean Cruise 2225, Lavender 410, Calico Red 932, and Medium Yellow 455

July 27, 2011

Martha Stewart & Plaid Coming To Canada

Last week we were very excited to announce the new partnership between Plaid and Martha Stewart. This innovative brand new line of paints, tools, and accessories, premiered on HSN and received a great reception by viewers in the U.S. Well now it’s your turn Canada to get an exclusive first look of this new line on The Shopping Channel. The Martha Stewart Craft Paint program will debut on The Shopping Channel, July 27th at 11pm EDST and July 28th at 11am, 5pm and 8pm EDST. This new line has been manufactured by Plaid Enterprises. The Martha Stewart Crafts™ Decorative Arts Paints Program debuts, exclusively in all U.S. and Canada Michaels stores in late August. We would love to know what you think about the new line after you watch on The Shopping Channel. Please be sure to leave us a comment here on our blog or Facebook page to let us know your thoughts. For additional information on the new line from Martha Stewart click here.

Alex Perruzzi will be introducing a variety of kits in Canada for home decorating including:

Beginner Stenciling Kit
Home Decor Kit
Adhesive Stenciling Kit
Painting Tools Kit
Spray Gun Kit
4, 6 oz. Paint Mediums
Multiple 2 oz. Paint kit Assortments including:
18 Satin Colors – Brights and Muted
12 Glitter Colors – Brights and Iridescent
12 High Gloss Colors
12 Metallic/Pearl Colors

July 22, 2011

Freelance Friday: Lamp Makovers

During the summertime months there are several projects that people decide to tackle. Many of those projects include performing makeovers within the home. I myself have been toying with the idea of doing a makeover on my bedroom, that is why this project from Laura Bray caught my attention. When I stumbled across this lamp shade she made over, I was so impressed. It is so cute, and I will definitely use it as inspiration for a lamp shade I will be working on. Laura used FolkArt acrylic paint to create this unique design. When it comes to interior decorating, it can become pricey very quickly. Knowing this, it just makes more sense to break out the craft supplies, and get creative! Thank you Laura for this amazing project. Can’t wait to get started on redoing my lamp shade. To learn step by step how Laura made this lamp shade please visit her blog, Katy Diddys. Have you performed a makeover on anything in your home lately? If so please tell us about it.