Posts tagged ‘FolkArt’

April 19, 2012

Technique Thursday: Create a Chalkboard Surface with FolkArt Chalkboard Paint

Have you crafted with chalkboard paint before? If you haven’t it’s something you should consider. Chalkboard paint allows you to create a chalkboard writing surface on wood, terra cotta or other materials. FolkArt Chalkboard Paint is great for decorating furniture, party favors or gifts. Below we are going to show you how to create a chalkboard surface.

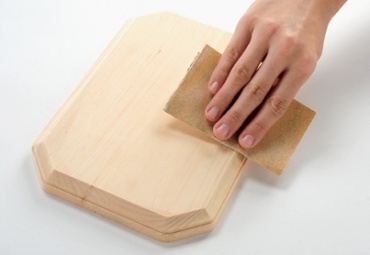
Lightly sand project surface (if needed).

Base-coat with a FolkArt Acrylic Color. Let Dry. Mask off area where you will apply Chalkboard Paint with tape.

Apply 2-3 coats of FolkArt Chalkboard Paint. Let dry between coats. Peel away tape while paint is wet.

Condition by rubbing entire surface with chalk and erase.
Your surface is now ready to be used. Enjoy!
February 21, 2012

Tuesday Tutorial: Pretty Stacking Organizers

Organization is a skill that can be taught. For many people they often struggle to stay organized, and have a hard time finding necessary items in a timely manner. Well we here at Plaid have the prefect solution to solve this issue. These pretty stacking organizers can make organizing papers, easy and pleasing to the eye all at the same time. This craft is a fun way to keep your desk tidy! These stacking organizers were created by, Kirsten Jones.

PLAID Supplies

  • FolkArt ® Acrylic Colors – Bright Baby Pink, 2 oz.
  • FolkArt ® Acrylic Colors – Pink, 2 oz.
  • FolkArt ® Acrylic Colors – Wicker White, 2 oz.
  • FolkArt ® Acrylic Colors – Licorice, 2 oz.
  • FolkArt ® Acrylic Colors – Fresh Foliage, 2 oz.
  • Mod Podge ® Gloss, 4 oz.
Other Supplies
Stackable wood trays (small medium and large), 1 piece of scrapbook paper per tray, ½” paintbrush, Small liner brush, Pencil, and Scissors

Instructions

  1. Base-coat boxes with Wicker White, let dry.
  2. Paint small box Fresh Foliage, medium box with Bright Baby Pink and large with Pink. Let dry.
  3. Using box as a pattern, cut paper to fit on all four sides.
  4. Following general directions on Mod Podge bottle, apply paper to trays. Let dry.
  5. Paint bottom of each tray with Licorice. Let dry.
  6. Using liner brush and Wicker White add words to the inside bottom of each tray.
  7. Let dry, then seal with a coat of Mod Podge.
January 12, 2012

Teaching Thursdays: Colorful Canvas Containers

Have you ever visited the Craftzine.com blog? Well in case you haven’t, you need to check it out. They have some awesome craft projects that they showcase. I recently stumbled across this one of, Color Canvas Containers. This project fits in perfectly with the theme of organizing. Here is yet another way to organize your crafts. There are becoming less and less reasons, as to why you can’t find a creative way to store your crafts. See below for the first few steps to create this project, then click here to see how it’s completed.

Supplies Needed:

Canvas drop cloth, Fabric scissors, Sewing machine, Ruler, Smaller scissors with sharp blade tips (for cutting the X for the side handle holes), Plaster of Paris or Fast Set Lite 20, Popsicle stick (for stirring), Water, Disposable latex gloves, and
Acrylic Paint
(the following Folk Art colors: 628 Pure Orange, 503 Yellow Citron, 425 Medium Gray, 633 Baby Pink, 2551 Moon Yellow, 403 Navy Blue, 481 Aqua)

Instructions:

Step 1: Cut a strip of fabric measuring 7″ x 22″. I tore the long side along a cut notch in the fabric to save time.

c3_step2.JPG

Step 2: Cut another piece that measures 5-1/2″ x 5-1/2″.

Step 3: Sew the two 7″ ends of the rectangle together, leaving a 1/4″ seam allowance. This will create your first side seam.

Click here to see the rest of the instructions.


December 30, 2011

Freelance Friday: Celebration Plate and Stemware

Are you getting your New Year’s plans and decorations ready? This is the last celebration of the year, so make it a good one. Aside from preparing for your new year festivities, take this time to reflect back on the past year. Do you have any crafting goals in the new year? End this year on a creative note, by crafting this celebration plate and stemware. This project was designed by one of Plaid’s talented designers, Chris Williams. To learn how to make this project click here.
December 21, 2011

Plaid’s 12 Days of Christmas: 4 Days to go

The clock is winding down, with only 4 days to go til the big day there is still plenty of time to get in the holiday spirit. A great way to get in the spirit is decorating your Christmas tress. Many of you have done this already probably, however I have heard that many decorate their trees in the days leading up to Christmas. In case you are looking to add some more ornaments to your tree, try creating these Vintage Ornaments. Julie Lewis designed these vintage ornaments. Aren’t these ornaments so unique and cute? All you need is some FolkArt paint, and Mod Podge. Click here to learn how to create these crafty ornaments.

November 15, 2011

Tuesday Huesday: Thanksgiving Blues

Thanksgiving can be an interesting time of year when it comes to decorating. Many people tend to stay very traditional and decorate using the normal fall colors, yellow, brown, and orange. But how about trying to incorporate some non-traditional colors within your Thanksgiving decorations? Take a look at this Thanksgiving table spread. It is from Lonny Magazine. I love the use of the blues, and gold tones within this table design. Normally blue is not a color you see within Thanksgiving decor. So with Thanksgiving right around the corner think about incorporating some non-traditional colors into your decorating palette.

This palette was created using FolkArt acrylic paint colors:#524 Calypso, #684 Medium Orange, #641 Brilliant Blue, and #905 Buttercup

October 28, 2011

The Winner of our FolkArt Giveaway Is…

Lindy from Veni Vidi Scrappy

She is the winner of our FolkArt Giveaway. The prize pack includes, 1 Large Fleur Motif FolkArt Stencil, 1 Alphabet Peel and Stick Stencil Sheet, and a 32 color FolkArt value pack paint set. This paint set includes metallic and glitter FolkArt colors.

Felur Motif Stencil

Alphabet Peel and Stick Stencil Sheet

FolkArt 32 paint color value pack

Thanks to everyone that participated and entered this giveaway. If you were not the winner this time, don’t worry we have another great giveaway coming up very soon. Be sure to check back daily on Paint Me Plaid, so you don’t miss your chance to enter.

October 21, 2011

Freelance Friday: Christmas Tray Made with New Easy To Paint Stencil

Can you believe that Christmas is only right around the corner? I know some of you are trying to deny it, but people get ready because it is coming and fast! Now I am sure some of you have already begun crafting for the Christmas holiday, but if you have not gotten started it’s ok there is still time. We here at Plaid wanted to start giving you some craft ideas that are easy to make, with products from our new Easy to Paint line. Recently one of our blogger friends, Megan, from the Brassy Apple created this adorable Christmas Tray. This tray was created with one of the new stencils from our Easy to Paint line. Click here to learn from the Brassy Apple how to make this Christmas craft.


October 13, 2011

Belinda Goes To Canada

As you may imagine, the people who work for Plaid do a lot of crafting in their spare time. One of Plaid’s employees, Belinda Harris, not only makes crafts, but she teaches craft classes as well. Belinda is a very talented, and experienced crafter. She normally teaches classes in Georgia, but beginning tomorrow Belinda will be attending a craft show in Canada, to teach. Belinda will teach 4 classes this week in Saint Hyacinthe, which is a city close to Montreal. Belinda will be attending and teaching at Salon des Arts Decoratives. See Belinda’s schedule below. She will be giving demos and classes just for this weekend. We are excited for Belinda, and we will definitely post pictures here on Paint Me Plaid from her trip.

The  Salon des Arts Decoratives hours are:

Friday, October 14th : 10 am till 8 pm
Saturday, October 15th : 10 am till 5 pm
Sunday, October 16th : 10 am till 5 pm

Belinda’s Schedule:

Thursday, October 13th – “Proud Rooster” 8 am to 12 pm. This is a 3-D, Layered Glass Painting


Friday, October 14th – “Days of Wine and Roses” – Wine Decanter and 2 Wine Glasses.  8 am to 12 pm.


Saturday, October 15th – “By the Sea” –  6pm to 10 pm.  This is a 3-D, Layered Glass Painting


Sunday, October 16th – “Winter Forrest” – 8 am to 12 pm.  This is a 3-D Layered Glass Painting

The demo’s will be :

Friday @ Creations Country Bear booth  from 2:30 pm to 4:00 pm. Belinda will demonstrate FolkArt Enamels and FolkArt Glitter in the booth.

Saturday @ Madame Pickwick booth from 1:00 pm to 2:00 pm. Belinda will demo Mod Podge Gloss, Matte, and explain our Simply Brush Set.

For more information on the show, please visit,  http://www.salonartsdecoratifs.com/
September 28, 2011

Web Wednesday: Debbie’s Floral Frame

Frames are often one of the most popular surfaces to paint on. Frames are so customizable, and can jazz up any photo of your family and friends. This frame was designed using one of our new stencils from the new Easy to Paint line. This is a very easy project to create, and perfect for any beginner crafter. Click here to see this, and other stencils from the new Easy to Paint line, available at AC Moore and Michaels now! To learn step-by-step how to make this frame click here.