Posts tagged ‘Holiday Crafts’

December 26, 2011

Make it Monday: Black and White Holiday Decor

By: Trenice Bishop

Even though the Christmas is technically over, it is still the holiday season. And if you would like to continue crafting Holiday crafts then you will like making this black and white wall plaque. Create this black and white mantel plaque, which will look great hanging on a wall in your home. This an intermediate level skilled craft. This project will take 2 hours or more to complete.

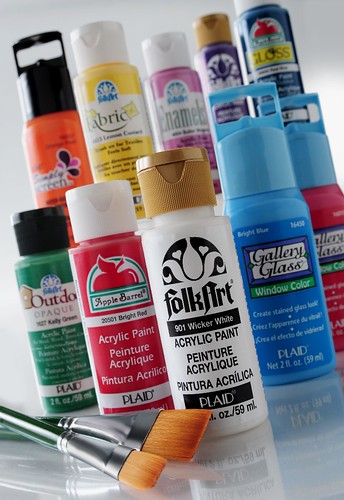
Plaid Supplies

FolkArt Acrylic Paint – 661 Metallic Sequin Black

FolkArt Acrylic Paint – 901 Wicker White

Other Supplies

Wood plaque, Paintbrushes, Clear gloss hobby and craft spray, Ruler (optional), Holiday message stencil (optional)

Instructions

1. Start by sanding the wood plaque to smooth any rough spots and edges prior to painting.

2. Remove and dust left behind on plaque.

3. Apply 1 coat of FolkArt Acrylic Paint – Metallic Sequin Black to the back of the wood plaque. Let dry for 10 to 15 minutes and repeat.

4. Let back of plaque dry at least 1 hour. When paint is dry, apply 2 coats of paint to the front as well. Let dry.

5. To create the look of a snow packed ground, use a thin bristle brush and make slight arches across the bottom of the plaque.

Painting the Trees

1. Use FolkArt Acrylic Paint – Wicker White and a thin bristle paintbrush to make the various sized trees.

2. Make the tree tops by making short strokes, as if you were writing the letter “J”.

3. Once you have made the tree tops use the same idea to shape the base of the tree.

4. Fill in the tree body using the same stroke pattern.

5. Make dots by dipping the paintbrush end in the paint to and add them to the tree body as well.

For the Snowflakes

1. Use the back of the paintbrush to makes dots in the places you wish to have snowflakes.

2. Drop small beads of the ModPodge Dimensional onto the paint dots placed on the plaque.

3. Allow the ModPodge Dimensional to dry at least 2 – 3 hours.

4. When the ModPodge Dimensional is dry, again use the back of the brush dipped in paint and dot the top of the dry ModPodge drops.

 For the Text

1. With a steady hand use the same thin brush to paint the text on to the plaque. You can also use a stencil to add your holiday greeting or make your own using FolkArt Peel and Stick Painting Stencils.
December 24, 2011

Plaid’s 12 Days of Christmas: 1 Days to go

Time is up! It’s the day before Christmas, and I sure hope you all have finished all your holiday shopping. If you have not, I would not want to trade places with you. I have a feeling those stores are going to be crazy, and very congested. Hopefully you can just relax and spend sometime at home with your family and friends. If you have some spare time, and would like to do something creative then your in luck. Try creating this Martini Glass and Ornaments Centerpiece. Toast the holidays with a bright and blinged out centerpiece that will be the talk of the table. This would be a great addition to have at your Christmas dinner tomorrow. This craft was designed by, Julie Lewis. Click here to see how this was created.

December 23, 2011

Plaid’s 12 Days of Christmas: 2 Days to go

Usually during this time of year I often end up baking a lot. I love to bake this time of year, and usually like to try our a new cake recipe. I usually have one dilemma when I back, and that is what to display it on. Well luckily one of our designers here at Plaid, Julie Lewis, created this amazing Snowflake Cake Plate. This plate is so festive and fun. Deck your dessert table with a truly unique hand crafted cake plate. If you too would like to make this cake plate click here to find the step by step instructions.

December 22, 2011

Teaching Thursdays: Santa Hat Topiaries

By Sherrie Ragsdale:

Looking for an inexpensive Christmas table centerpiece? Well here is a great project to create. These Santa Hat Topiaries are a great holiday decor to add anywhere in your home. This project was created by our designer, Sherrie Ragsdale. Majority of the supplies used for this craft can be found at your local dollar store. See below all the supplies needed, and the step by step instructions to follow. So cute and so amazing!

Plaid Supplies:

4001 Folkart Enamel Wicker White

4133 Folkart Enamel Lipstick Red

901 Folkart Acrylic Wicker White

437 Folkart Acrylic Lipstick Red

4405 Folkart Fabric Engine red

28821 Plaid circle 8×10 circle stencil

30464 Plaid Peel and Stick Painting Blank Stencil

30666 Plaid Peel and Stick Painting Stencil

Plaid Dauber Set

Other Supplies:

Three glass vases, Three santa hats, Three 1/2 inch x 12 inches dowel, Two 3-7/8in x 8-7/8in, One 4-7/8in x 12-7/8in, Quilt Batting, Polyfil, Candy Canes, Scrap pieces of Styrofoam, Pencil, Ruler, Hot glue, Sewing Machine, Scissors, 1/4″ masking tape, Craft Knife

Instructions:

1.  Using the circle stencil, cut out a circle from the adhesive stencil sheet with a craft knife for each vase.


2.  Place in the center of the glass vases.

3.  Using the 5/8″ dauber, paint the circle with the enamel lipstick red.

4.  Remove the circle stencil.

5.  Stencil “HO” on each of the vases in the center of the red circle.


6.  Fill in the letters where the line is broken with a liner brush.

7.  Base-coat the dowels with wicker white.

8.  Wrap the 1/4″ masking tape around the dowels as shown in photo.

9.  Using the dauber, paint the dowels with acrylic lipstick red.

10.  Remove the tape.


11.  Cut the trim off hat.

12.  Measure the topiaries and the sew the sides of the hat to fit snug around the cones.  You can also hot glue it.

13.  Trim the excess fabric.

14.  Cut the trim and open up flat.

15.  Measure the cones and cut a piece of quilt batting to wrap around cone.  Hot glue in place.

16.  Using the circle stencil make large circles using Folkart fabric red lipstick on the center hat and smaller dots on the smaller hat.  Hot glue white trim and cut.

17.  Cut the a piece of styrofoam from scraps and glue to the bottom with hot glue.

18.  Stick dowels into the bottoms of cones.

December 22, 2011

Plaid’s 12 Days of Christmas: 3 Days to go

Gingerbread cookies are some of my favorite treats to indulge in this time of year. That’s why I was so excited to see this adorable Gingerbread Photo Cube. One of our in house designers, Chris Williams created this photo cube.  This is a great way to keep holiday memories alive all year long. I love gingerbread cookies during the holidays, what is one of your favorite holiday treats to eat this time of year? See below for instructions and supplies you will need to create this project.
PLAID Supplies

  • FolkArt ® Acrylic Colors – Gilded Oak, 2 oz.
  • FolkArt ® Acrylic Colors – Wicker White, 2 oz.
  • FolkArt ® Acrylic Colors – Calico Red, 2 oz.
  • FolkArt ® Acrylic Colors – Licorice, 2 oz.
  • FolkArt ® Acrylic Colors – Maple Syrup, 2 oz.
  • Plaid ® Wood Surfaces – Frames – 4-Way Memory Frame
  • Mod Podge ® Matte , Gallon

Other Supplies
No. 12 flat brush, No. 1 liner brush, 5 3.25” gingerbread man cutouts, Brush basin or container for water, Paper towels, Foam plate, Fine grit sandpaper, Tracing paper, Pencil, Gray graphite, Stylus (opt.), White craft glue, 2 sheets striped scrapbook paper, Sheet of brown patterned scrapbook paper

Instructions

Surface Preparation:

  1. Lightly sand rough areas with fine grit sandpaper.
  2. Basecoat sections of the base and top and allow to dry. Flat top surface: Wicker White,  Rounded section of routed edges both on top and bottom: Calico Red,  Base and bottom: Gilded Oak,  One Gingerbread Man Cutout: Gilded Oak.
  3. When dry, sand if necessary and reapply basecoat colors. Allow to dry.

Tracing and Transferring a Pattern:

  1. Place the printed pattern face side up before you.
  2. Lay a sheet of tracing paper on top of the printed pattern. NOTE: you may secure the sheet of tracing paper to your surface with a piece of tape.
  3. Using a soft lead pencil, or a fine point permanent ink black marker, trace over the main pattern lines. DO NOT worry about tracing over detail lines as they will not be transferred.

Painting Instructions:

  1. Gingerbread Man – Double load the No. 12 Flat Brush with Gilded Oak and Maple Syrup. Blend on the palette; shade along the outside edge of one gingerbread man cut out.
  2. When dry, paint two Licorice dot eyes using the handle end of the No. 1 Liner Brush.
  3. Add a pair of Calico Red cheeks highlighted with a tiny dot of Wicker White.
  4. Paint a Calico Red heart using the No. 1 Liner Brush.
  5. Paint all the icing areas: wiggle lines, buttons, bow tie, nose and smile with thinned Wicker White using the No. 1 Liner Brush.
  6. Top of Photo Cube – Transfer square pattern lines and lettering.
  7. Double load No. 12 Flat Brush with Wicker White and Gilded Oak. Blend on the palette; shade Gilded Oak along the inside square pattern lines. Refer to photo.
  8. Load No. 1 Liner Brush with thinned Calico Red. Paint lettering along edge.
  9. Using same brush loaded with thinned Maple Syrup, paint dash – dot – dash pattern separating the inner and outer square.
  10. Flyspeck or splatter paint the top surface with thinned Maple Syrup. Also flyspeck the painted base and routed edge. Allow to dry.

Mod Podge Instructions:

  1. Photo Cube – measure and cut striped patterned scrapbook paper to fit the four sides of the photo cube.
  2. Work one side of the cube at a time. Using No. 12 Flat Brush, apply Matte Mod Podge to the surface of the photo cube. Brush a layer of Mod Podge on the back side of the precut paper.
  3. Place the paper pattern directly onto the Mod Podge’d surface. With pressure, smooth the paper in place removing excess Mod Podge and any air bubbles. Wipe away excess Mod Podge and allow drying a few minutes. Repeat for three other sides.
  4. When dry to the touch, apply a coat of Mod Podge to the entire photo cube.
  5. Gingerbread Men Cutouts– Lay paper pattern side down. Place wood cutout on top; lightly trace around cutout. Cut paper patterns of gingerbread men.
  6. Attach paper to wood cuts in same manner as the photo cube. Allow to dry.
  7. When dry, paint edges Maple Syrup. Paint body icing, heart, and facial features same as top gingerbread man cut out.

Finishing Touches –

  1. Attach the wood cutouts to the top and sides of the photo cube using white craft glue.
  2. Sign your name and allow drying.
  3. When dry, if desired, you may apply a final coat of Matte Mod Podge to seal and protect your artwork.
December 21, 2011

Plaid’s 12 Days of Christmas: 4 Days to go

The clock is winding down, with only 4 days to go til the big day there is still plenty of time to get in the holiday spirit. A great way to get in the spirit is decorating your Christmas tress. Many of you have done this already probably, however I have heard that many decorate their trees in the days leading up to Christmas. In case you are looking to add some more ornaments to your tree, try creating these Vintage Ornaments. Julie Lewis designed these vintage ornaments. Aren’t these ornaments so unique and cute? All you need is some FolkArt paint, and Mod Podge. Click here to learn how to create these crafty ornaments.

December 20, 2011

Tuesday Tutorial: Joy Bottle holders

By: Sherrie Ragsdale

Supplies:

FA Enamels: 4035 Metallic Silver Sterling, 4002 Warm White, 4039 Calypso Sky, 2799 Glitter Silver

2790 FA Extreme Glitter Turquoise

30470 Plaid FA Peel and Stick Painting Stencils

Other Supplies:

Three re-purposed bottles, Three clear glass disc ornaments, 1/4″ dauber, 5/8″ dauber, Masking tape, Liner brush, 1/8″ silver ribbon

Instructions:

Here is the before photo.

1.Tape off the bottle with masking tape to make random stripes.

2.  Using the 5/8″ dauber, paint the stripes with metallic silver sterling.

3.  Add a calypso sky stripe.

4.  Add a warm white stripe.

5.  Remove tape.

6.  Add silver extreme glitter to the silver stripes.

7.  Add the snowflake adhesive stencil and stencil in warm white using the 1/4″ dauber.

8.  Stencil small snowflakes in calypso sky.

9.  Add dots using calypso sky with the end of a paint brush.

10.  Fill the ornament with the extreme glitter turquoise.  Shake until the inside of ornament if covered.  Add more if needed.

11.  This is the ornament completely filled.  Set up side down and allow to excess to drain out.

12.  Paint “JOY” on ornaments in warm white upside down.

13.  Tie a 1/8″ silver ribbon to the top of bottles.

14.  Place the ornament holder back into the ornament and place in bottles.

December 19, 2011

Make it Monday: White Ornaments

By Sherrie Ragsdale:

Ornaments make such a great surface to craft on during the holidays. You can get as creative as you would like, and create vibrant color schemes on them. Take these white ornaments that were designed by a Plaid designer, Sherrie Ragsdale. These three ornaments all have colors in common, but are still different in design. Use these ornaments to decorate your tree with, or use them as a table decor.

Plaid Supplies:

662 Folkart Metallic Sterling Silver

901 Folkart Acrylic Wicker White

2787 Folkart Extreme Glitter Silver

2790 Folkart Extreme Glitter Turquoise

50147 Plaid Dauber Set

Other Supplies:

White Glass ornaments, 1/4″ Masking Tape, Turquoise Ribbon, and Silver Ribbon

Instructions:


1.  Make Dots with 5/8 dauber with the metallic silver sterling. After they dry go back over with the silver extreme glitter.

2.  Tape off the stripes with the 1/4″ masking tape.

3.  Add turquoise extreme glitter to every other stripe using the dauber. Remove tape.

4.  Add silver dots with the end of a paint brush. Allow to dry and then go over with the silver extreme glitter.

5.  Paint a silver stripe around the center. Once dry add silver extreme glitter.

6.  Using dauber paint over silver glitter with wicker white.

7.  Go over white with turquoise glitter and then remove tape.


8.  Tie turquoise ribbon for hanging and a silver bow for the front of ornament.


December 18, 2011

Plaid’s 12 Days of Christmas: 7 days to go

Here is a great holiday recycle project you can make. If you just ordered some Chinese takeout, your in luck. We have a great project you can create using these left over boxes. Try creating this Holiday Forest Chinese Box. This was designed by one of our designers, Kindra Boroff. See below all the supplies you will need, and the instructions below.

PLAID Supplies

  • FolkArt ® Artists Pigments™ – Pure Black, 2 oz.
  • Mod Podge ® Dimensional Magic, 2 oz.
  • Mod Podge ® Matte, 4 oz.

Other Supplies

Chinese takeout box, Scrapbook paper, 1/8” Red satin ribbon, Hot glue, Scissors, Hole punch, Pop dots

Instructions

  1. Carefully unassembled the Chinese box. Using the sides as patterns, trace on the polka dot paper. Cut out and adhere to the sides with Mod Podge.
  2. Trace a section of the tree lined paper for the front of the box. Cut the trees out. Adhere to the front of the box with Mod Podge. Cut 2 more trees out individually.
  3. Apply a coat of Dimensional Magic to the trees and allow to dry completely.
  4. Attach the 2 separate trees to the front with pop dots as shown.
  5. Cut 3 ½” circle from the green striped paper. Using the circle as a template, create a scalloped edge larger than the circle. Lay the green circle on top of the polka dot and glue with Mod Podge.
  6. Trace a small circle around the bird and glue to the center of the large circle. Apply Dimensional Magic to the small circle.
  7. Hot glue the red ribbon around the edge of the box as shown.
  8. Punch two holes in the circle tag and tie to the top of the box with red ribbon.
December 17, 2011

Plaid’s 12 Days of Christmas: 8 days to go

Silver and gold make a festive holiday home. These two colors can add wonders to your home this time of year. If you would like add some sparkle to your holiday decor, create these Martha Stewart Holiday Candles. Martha Stewart makes some of the most beautiful craft project for the holidays, and these are no exception. Simply follow the instructions below, and enjoy!

PLAID Supplies

  • Martha Stewart Crafts™ 2oz Multi-Surface Metallic Acrylic Craft Paint – Yellow Gold
  • Martha Stewart Crafts™ 2oz Multi-Surface Metallic Acrylic Craft Paint – Copper
  • Martha Stewart Crafts™ 2oz Multi-Surface Glitter Acrylic Craft Paint – Florentine Gold
  • Martha Stewart Crafts™ 2oz Multi-Surface Glitter Acrylic Craft Paint – Copper
  • Martha Stewart Crafts™ 2oz Multi-Surface Glitter Acrylic Craft Paint – Antique Silver
  • Martha Stewart Crafts™ 2oz Multi-Surface Glitter Acrylic Craft Paint – Obsidian
  • Martha Stewart Crafts™ Foam Pouncers Set – 6pc

Other Supplies
Small toy animals
Assorted sizes of pillar and taper candles
Assorted sizes of glass candlesticks and pedestals
Brush basin or container of water
Foam plates
Paper towels

Instructions

Painting Instructions:

Candles

  1. Using a foam pouncer, apply three to four coats of glitter paint by dabbing straight up and down to the surface of the candle.  Allow each application of glitter paint to dry before applying the next.
  2. Continue painting until each candle is glitter painted to your liking.  NOTE:  Do not apply paint at the top of each candle near the wick.

Small Plastic Animals

  1. Using a foam pouncer, undercoat each animal with a coat of pearl paints – either Copper, Yellow Gold or Sterling.  Dab the loaded pouncer straight up and down to apply the paint.  Allow to dry.
  2. When dry, paint a couple coats of glitter paint over the pearl.  Paint Copper glitter over Cooper pearl, Florentine Gold glitter over Yellow Gold pearl, and Antique Silver glitter over Sterling pearl.  Allow each coat of glitter paint to thoroughly dry before applying the next.