Archive for April 5th, 2012

April 5, 2012

Technique Thursday: Essential Mod Podge Techniques

Prepare your surface. Almost any surface can be used to create a decoupage project. Suitable surfaces include wood, paper mache, terra cotta, tin, cardboard, glass and craft foam. Only SOME plastics are suitable for decoupage – we recommend testing a small area before completing your entire project to make sure that the Mod Podge will adhere.

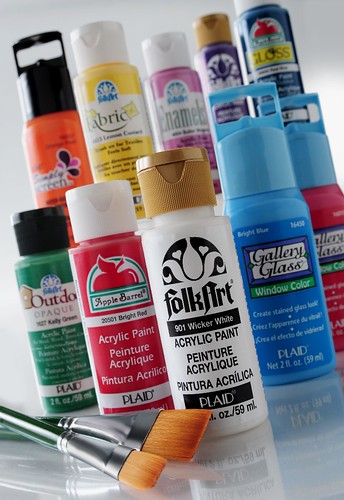
Base-coat your surface (optional step). Many items need to be base-coated before decoupaging if your surface is unfinished. We recommend FolkArt or Apple Barrel Acrylic Paints for base-coating.

Prepare Items to be Mod Podged. Here a few tips you should know before beginning.

  • Fabric – Wash and dry the fabric (do not use fabric softener). Iron and then lay out on a covered work surface.
  • Wax paper is preferable for covering your table. Using a brush, paint a light coat of Fabric Mod Podge onto your fabric.

Allow to dry. This will allow you to cut the fabric like paper without frayed edges.

  • Paper – Most items, especially thicker papers, are ready to be Mod Podged as is. If you are working with thinner sheets of scrapbook paper, it may help to spray your paper with a clear acrylic sealer before Mod Podging. Spray both sides and allow to dry before using.
  • Tissue Paper – There is nothing that you need to do to prepare tissue paper, but just be advised that because it is so thin, it is very difficult to Mod Podge without wrinkles. The good news is that wrinkles are typically part of the charm of using tissue paper and add a little character to your surface. Mod Podge tissue paper carefully so that it doesn’t tear. Cut out your paper or whatever it is that you are planning to decoupage. Experiment with design elements to determine the layout of your piece. Add interest to your design by using large and small pieces, layering and overlapping elements and coordinating colors.

Adhere each element with the Mod Podge finish of your choice. Always start with the underlying design elements and work your way upward. Apply a medium coat of Mod Podge to the surface. Too little Mod Podge and you will get wrinkles – you can always wipe away excess Mod Podge. Place your item(s) to be decoupaged on top of the Mod Podge and smooth thoroughly.

Keep smoothing until all of the bubbles are removed.

When working with large pieces, smooth from the center outward. Air bubbles can be removed with the Mod Podge Tool Set. Use the squeegee with smaller items such as trays – it was developed specifically for getting into corners.
Use a brayer for larger items such as furniture.
Add a protective coat of Mod Podge to your project using a sponge or flat brush. Allow to dry and then repeat. The number of coats you finish with is up to you, but we recommend at least two.
For a very smooth finish, wet a piece of #400 grit sandpaper with water and sand lightly between coats. Wipe dry and polish with #0000 steel wool on the final coat.
April 5, 2012

Teaching Thursday: Step Stool by Every Creative Endeavor

Hello PLAID readers!! I am so excited to be here today sharing a fun little project. My name is Amanda and I am the creator and author of Every Creative Endeavor – a fun little blog about all things DIY for you and your home! I love to make items for my house; there is just something so great about completing a project that beautifies your home. I also love making things for my kids – again, there is something so gratifying in seeing your kids love something you have made them. Today I am going to share a fun little Monogrammed Step Stool I made for my son.  We just finished potty training but I realized he would need something to help reach the toilet and the sink to wash his hands and a fun little step stool was the perfect solution!

First, I headed out to Michaels – a great store to pick up PLAID products – and found this fun little stool.

I brought it home and used #459 Hauser Green Light by FolkArt by PLAID and gave it a few good coats. This green is one of my very favorite colors! It is bright and fun and perfect for a little boy.

Next I cut out a “Q” with some scrapbook paper I had in my supplies. I used a cutting machine to cut it out so you could use one of those if you have one or just print one out on your computer and trace it onto your paper – I used to that all the time. It works great!! Using Gloss Mod Podge, I glued the letter onto the stool. I first applied a coat to the stool and then applied my “Q” and then added a few more coats over the top. TIP: If you are finding little bubbles in your letter while the Mod Podge is drying, simply take your hair dryer and apply it to the bubble and it will flatten.

I also used the Mod Podge to coat the entire stool and give it a nice little glossy shine. It turned out perfect and my son loves it!

It is the perfect little step stool to reach those high places. And yes, even I have used it a couple times to reach a few things up high in my pantry. My daughter loves it too so I may be making a fun little pink one in the near future!

Thank you so much for having me today and I would love for you to stop by Every Creative Endeavor to see what other projects I have been working on!

Amanda